User Expiry Dates
This article explains how you can use the User Export feature to check whether any of your users' access will be expiring in the near future.
Using 'Valid From' & 'Expiry' dates
VOLO allows you to optionally specify a start and end date for a user's access (one, other, or both). This will override any assigned access level and restrict that user's access to between the selected dates.
These settings will not impact which doors can be accessed or what time of day - this will still be controlled by the
user's assigned access level. The Valid From and Expiry dates asser an overarching start and stop date to the user,
so even if their access rights change, their access will still be revoked when the expiry date comes around.
When should I use them?
Some typical examples of when you might want to use Valid From and Expiry dates are:
Education - Term Time
If VOLO is being used to control access on Educational sites where you know term start and end dates in advance, you
can set up the access credentials with the correct access level in advance, but set a Valid From and Expiry date to
prevent the credentials from being used outside of term time.
Contract Staff
If VOLO is being used to control access where you have short term staff, or perhaps someone covering longer term leave (maternity, for example), then this is another example of where you have a fixed date range where those user's should have access and you can pre-configure the start and end of the user's access.
New Starters
It could be convenient for your HR/IT/Security department to configure access credentials for new starters in advance of their start date. These can be shared with Reception/the employee or their line manager in advance and will begin working on the designated date.
Similarly, an Expiry date could be added to an existing user's record in VOLO if they hand in their notice. This will allow your HR/IT/Security team to arrange for their access to be revoked automatically on the date that their employment ends.
How do they work?
When creating or editing a user you will see two fields for you to set as you wish:
- Valid From - this is the date on which the user's access will begin (they WILL have access on this date)
- Expires - this is the date on which the user's access will end (they will NOT have access on this date)
In both cases, if you wish to set a date, you must check the box and then select the appropriate date.
info
The Valid From and Expires dates are not intended to provide precise control over a user's access within a day (
you cannot specify a start time or end time).
The user's access level should be used to determine specific periods of time when they can or cannot access specific areas.

Auditing User Expiry Dates
This section of the article describes how you can use the User Export function to easily audit any valid from and expiry dates you have in use for your users.
Prerequisites
This article assumes the following:
- You have a VOLO account with some active users
- Some of your users have an expiry date associated with them
- You have generated a user export file, following the instructions on this page.
Instructions
1. Select your data
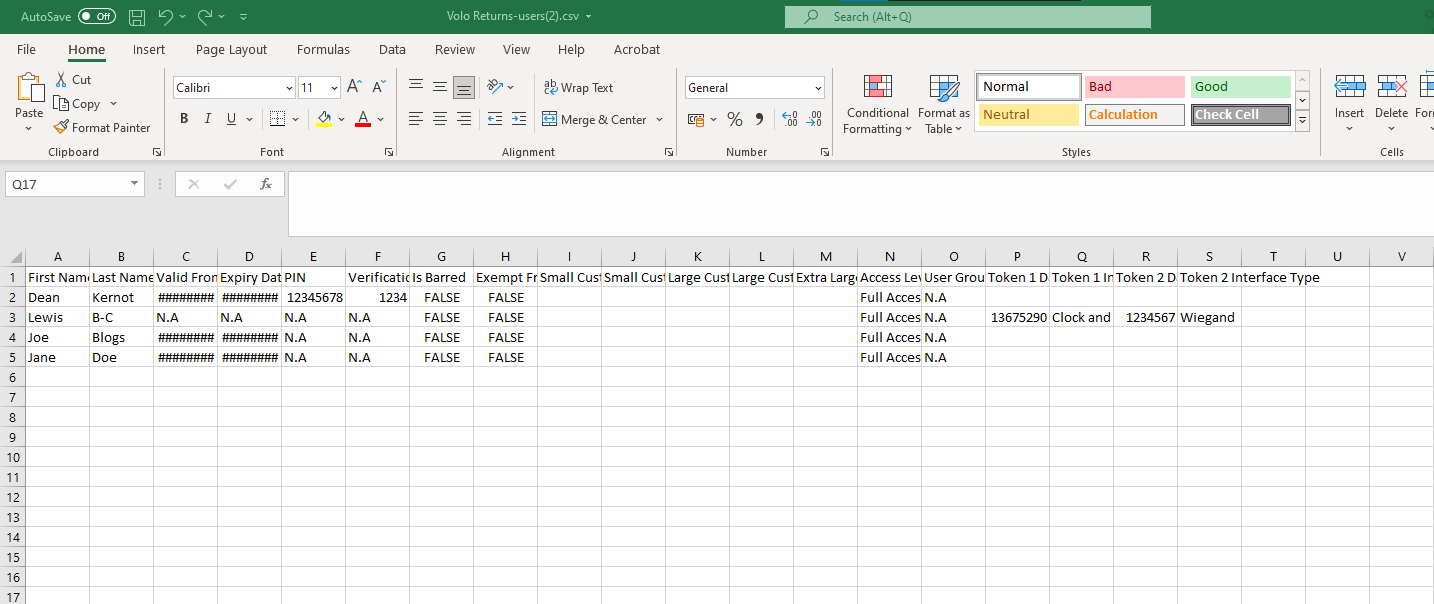
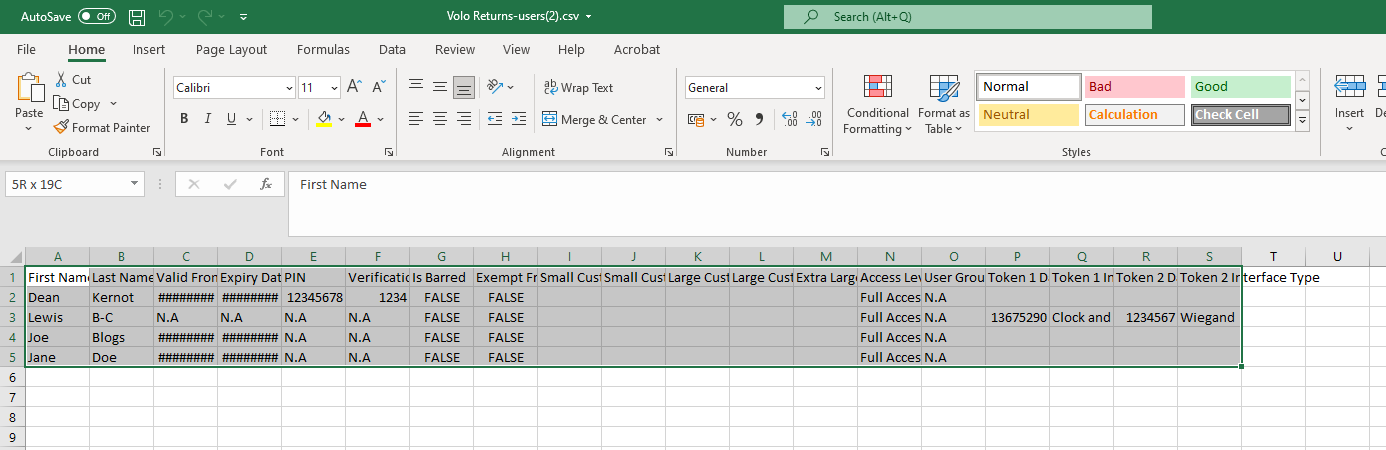
Open your user export file with Microsoft Excel and then select all the data in the file.
info
You can do this by clicking in cell A1 and dragging to select all the data OR You can also do this by clicking in cell A1 and then pressing ctrl + shift + right arrow on the keyboard, followed by pressing ctrl + shift + down arrow on the keyboard.
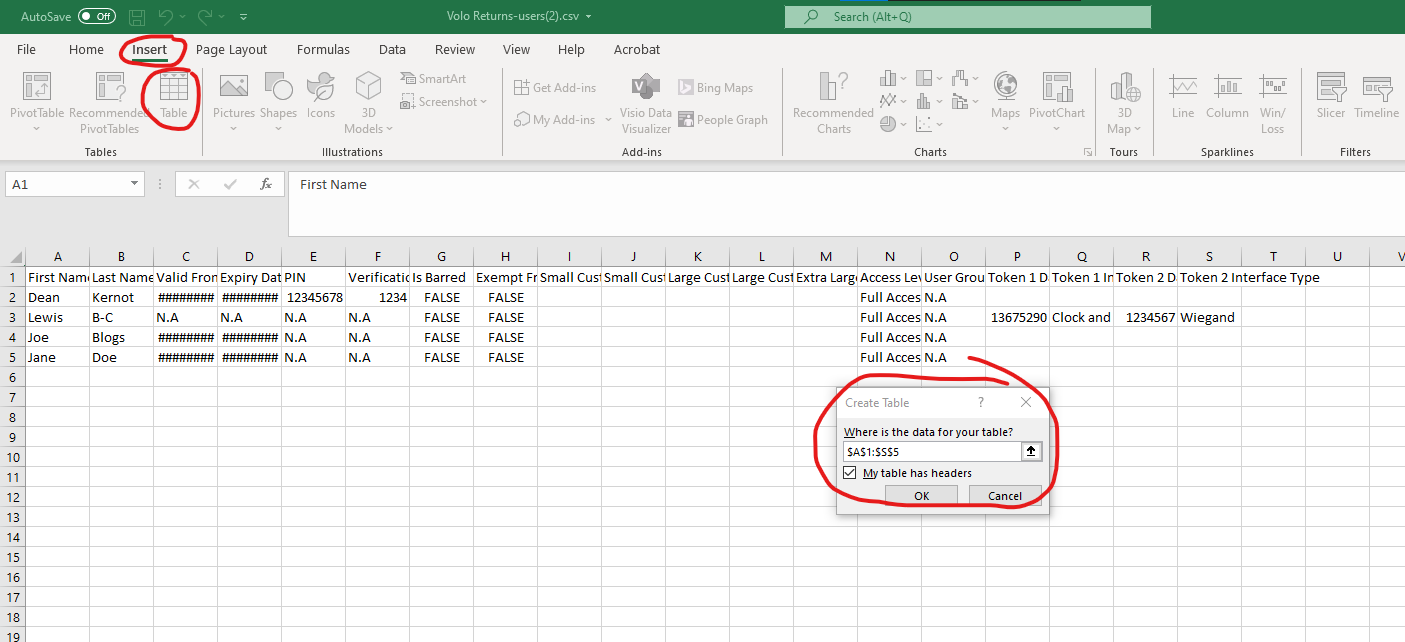
2. Create a 'Table'
Once all the data is selected, click on the 'Insert' menu option at the top of the Excel window. From there, select the 'Table' option which is just below the 'Insert' menu button.
You should see a pop-up window appear which displays the data range that will be converted into a table. Click the 'OK' button on the pop-up window.
3. Work with the Data
Now that you have your data nicely formatted as a table in Excel, you can begin to filter and sort the data much more easily.
Each column now has a little drop-down button which allows you to filter the table by selecting or de-selecting any of the options found within that column. You can also sort the data in ascending or descending order from this same drop-down menu.
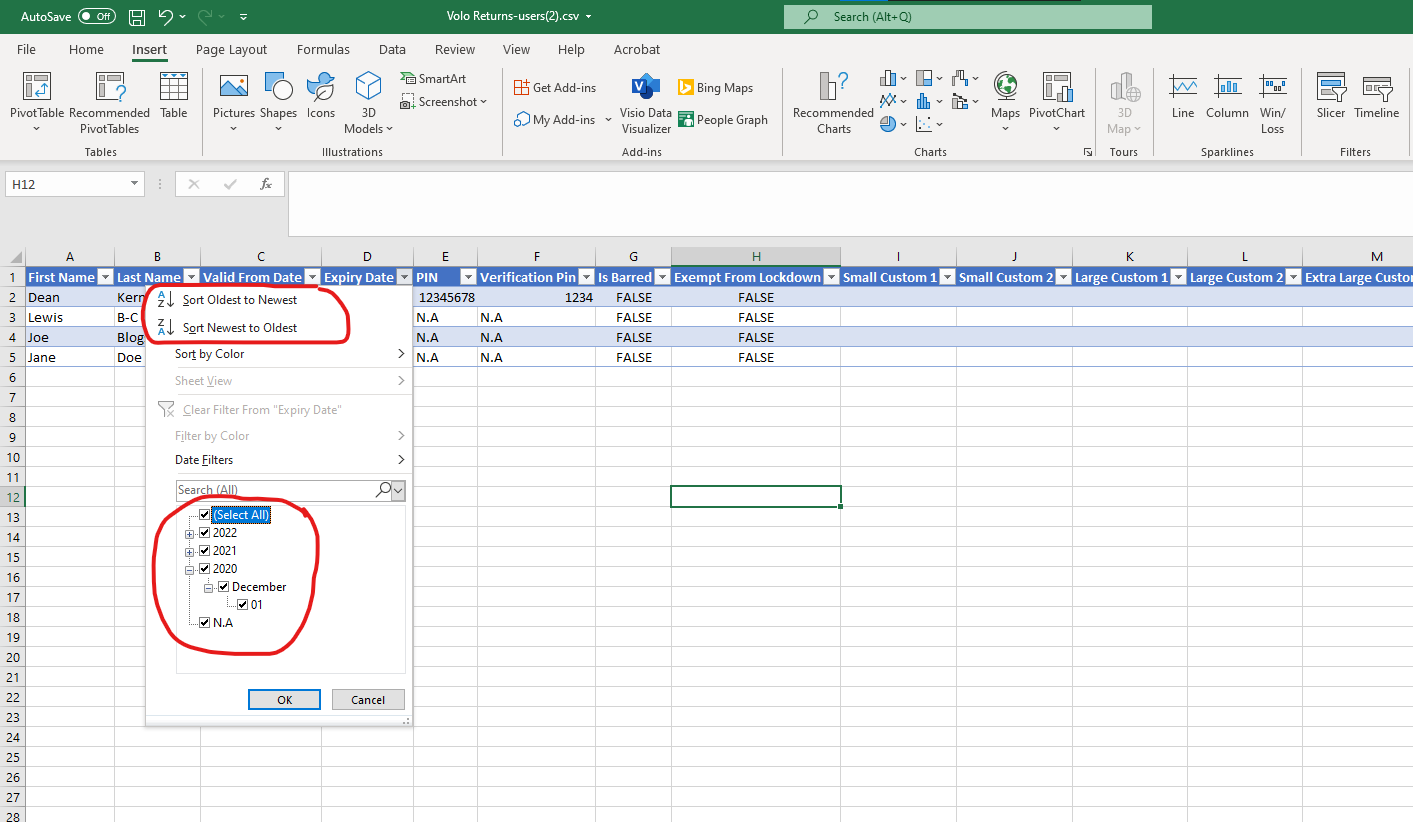
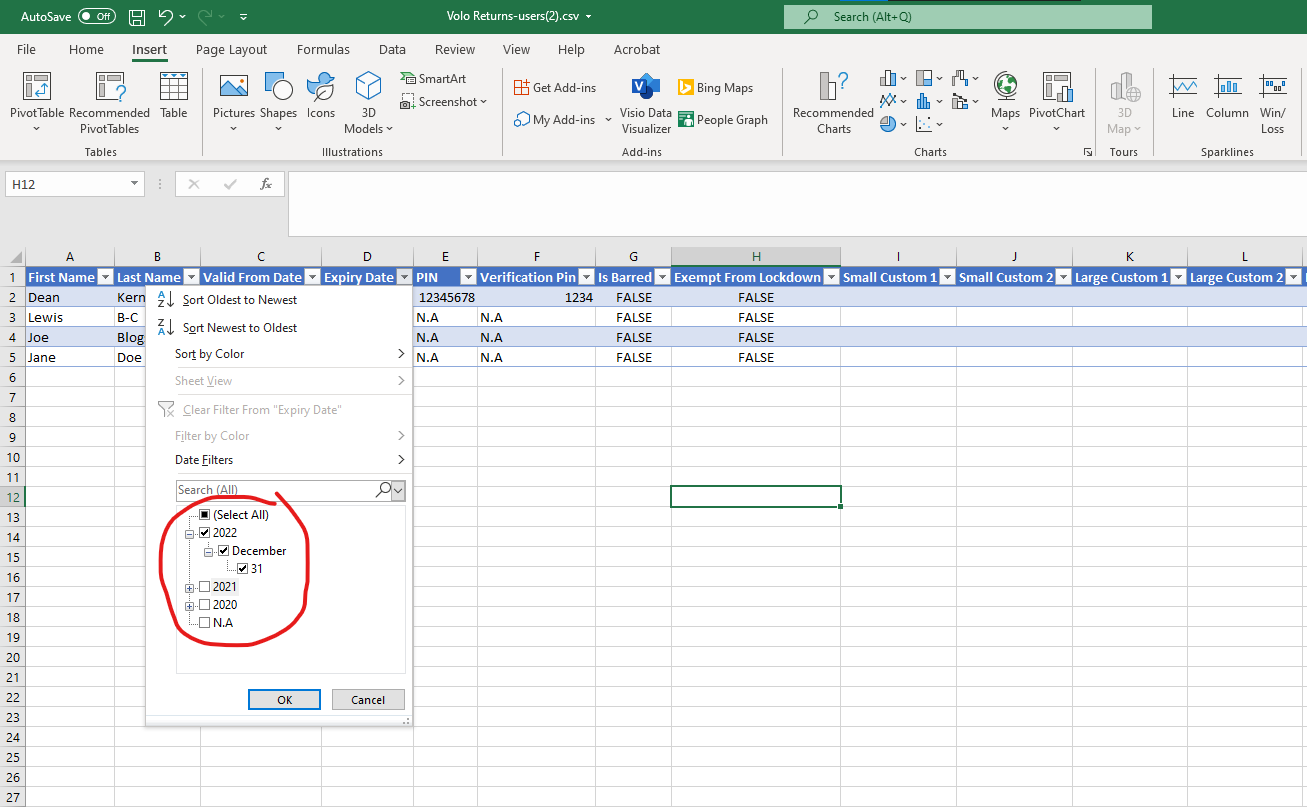
In this example, we are interested in the Expiry Date. When we hit the drop-down button on this column, we can see a series of check boxes which have been grouped by date (year, then month, then date) as well as an 'N.A.' group.
info
The 'N.A.' group represents all users who have not had an expiry date set.
In addition to these checkboxes, you also have the options of 'Sort Oldest to Newest' and 'Sort Newest to Oldest'.
4. Example
In our example, we have 4 users:
- 1 with no expiry date
- 1 with an expiry date in 2020
- 1 with an expiry date in 2021
- 1 with an expiry date in 2022
If we imagine we are working on a report with hundreds or thousands of users instead of just 4. How can we focus in on the data we need?
Handling Legacy Users (Expiry dates from past years)
Firstly, we should clean up any users with an expiry date in prior years using the following process:
- uncheck the box for N.A
- uncheck the box for 2022
- uncheck the box(es) for any years after 2022 (if you have any showing in your report)
This will leave us with only users who have an expiry date from past years. You can then save this data or copy and paste it into another file ready to be processed accordingly - for example:
- check whether the user is still active
- determine whether their access should be extended
- verify that they have the correct access level assigned
- either delete the user (if no longer needed), or update their expiry date
Handling Recently Expired Users
The next step should be to filter again using the following steps:
- uncheck the box for N.A
- uncheck all year boxes except for the current year
- expand the boxes for the current year
- uncheck all boxes for months in the future
Any data remaining visible in your report after making these changes represents users who have expired this year.
You should then follow your internal processes for handling these users (see example above).
Handling Users who are soon to expire
The next step should be to filter again using the following steps:
- uncheck the box for N.A
- uncheck all year boxes except for the current year
- expand the boxes for the current year
- uncheck all boxes for months in the past
Any data remaining visible in your report after making these changes represents users who are expected to expire this year.